Radxa X4 N100 Cluster Build Log - Part 2: The Fan
This part is about connecting a fan to the RADXA X4 using the GPIO, but can also be used to connect a fan to the GPIO of the Raspberry Pi 5.
Documentation
Like starting any project, we need to read the documentation.
We can find the GPIO Definition here and an example for using the GPIO and even configuring PWM here.
Great! That is almost all what we need.
Fan choice
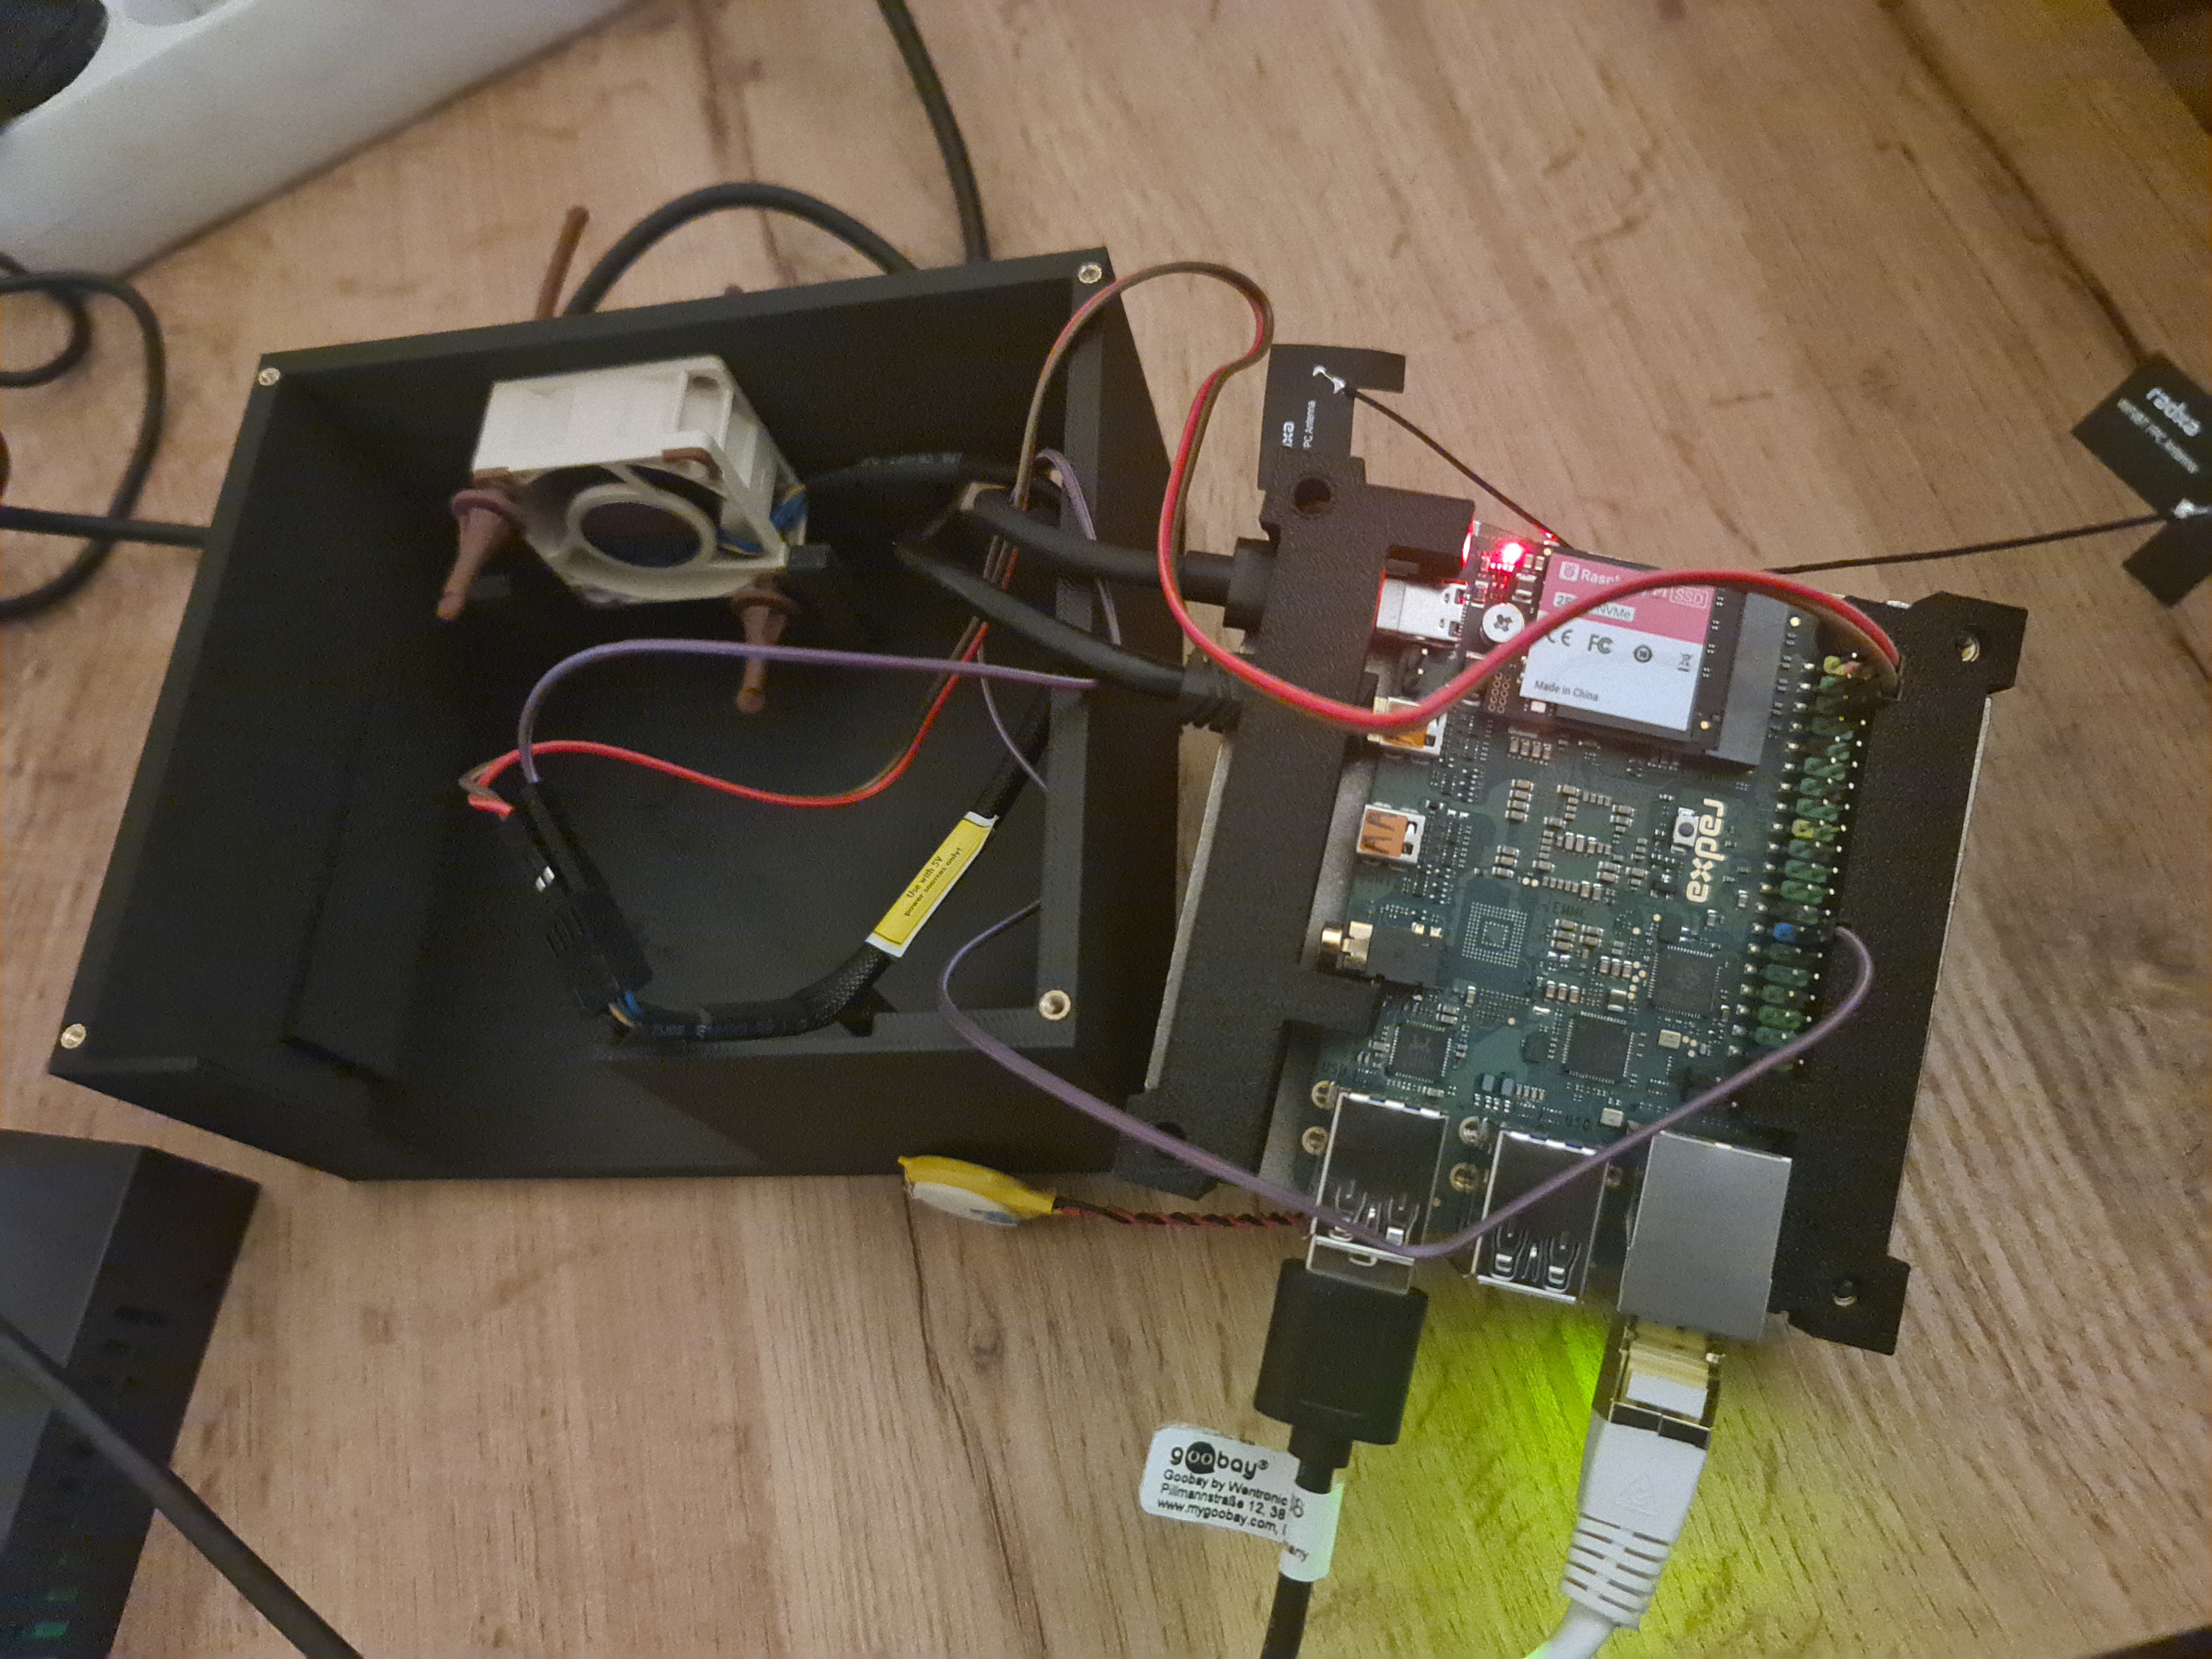
Now for the fan. There are quite a few 5V fans available, but most that I used are really whiny, that’s why is splurged a little and chose the Noctua NF-A4X20 PWM (NO NF-A4X20PWM5V), but any 5V fan should work. For the connections I will use jumper wires.
Pinout
Now to connect the fan to the GPIO, we need to know which pins to use. The official configuration can be found here.
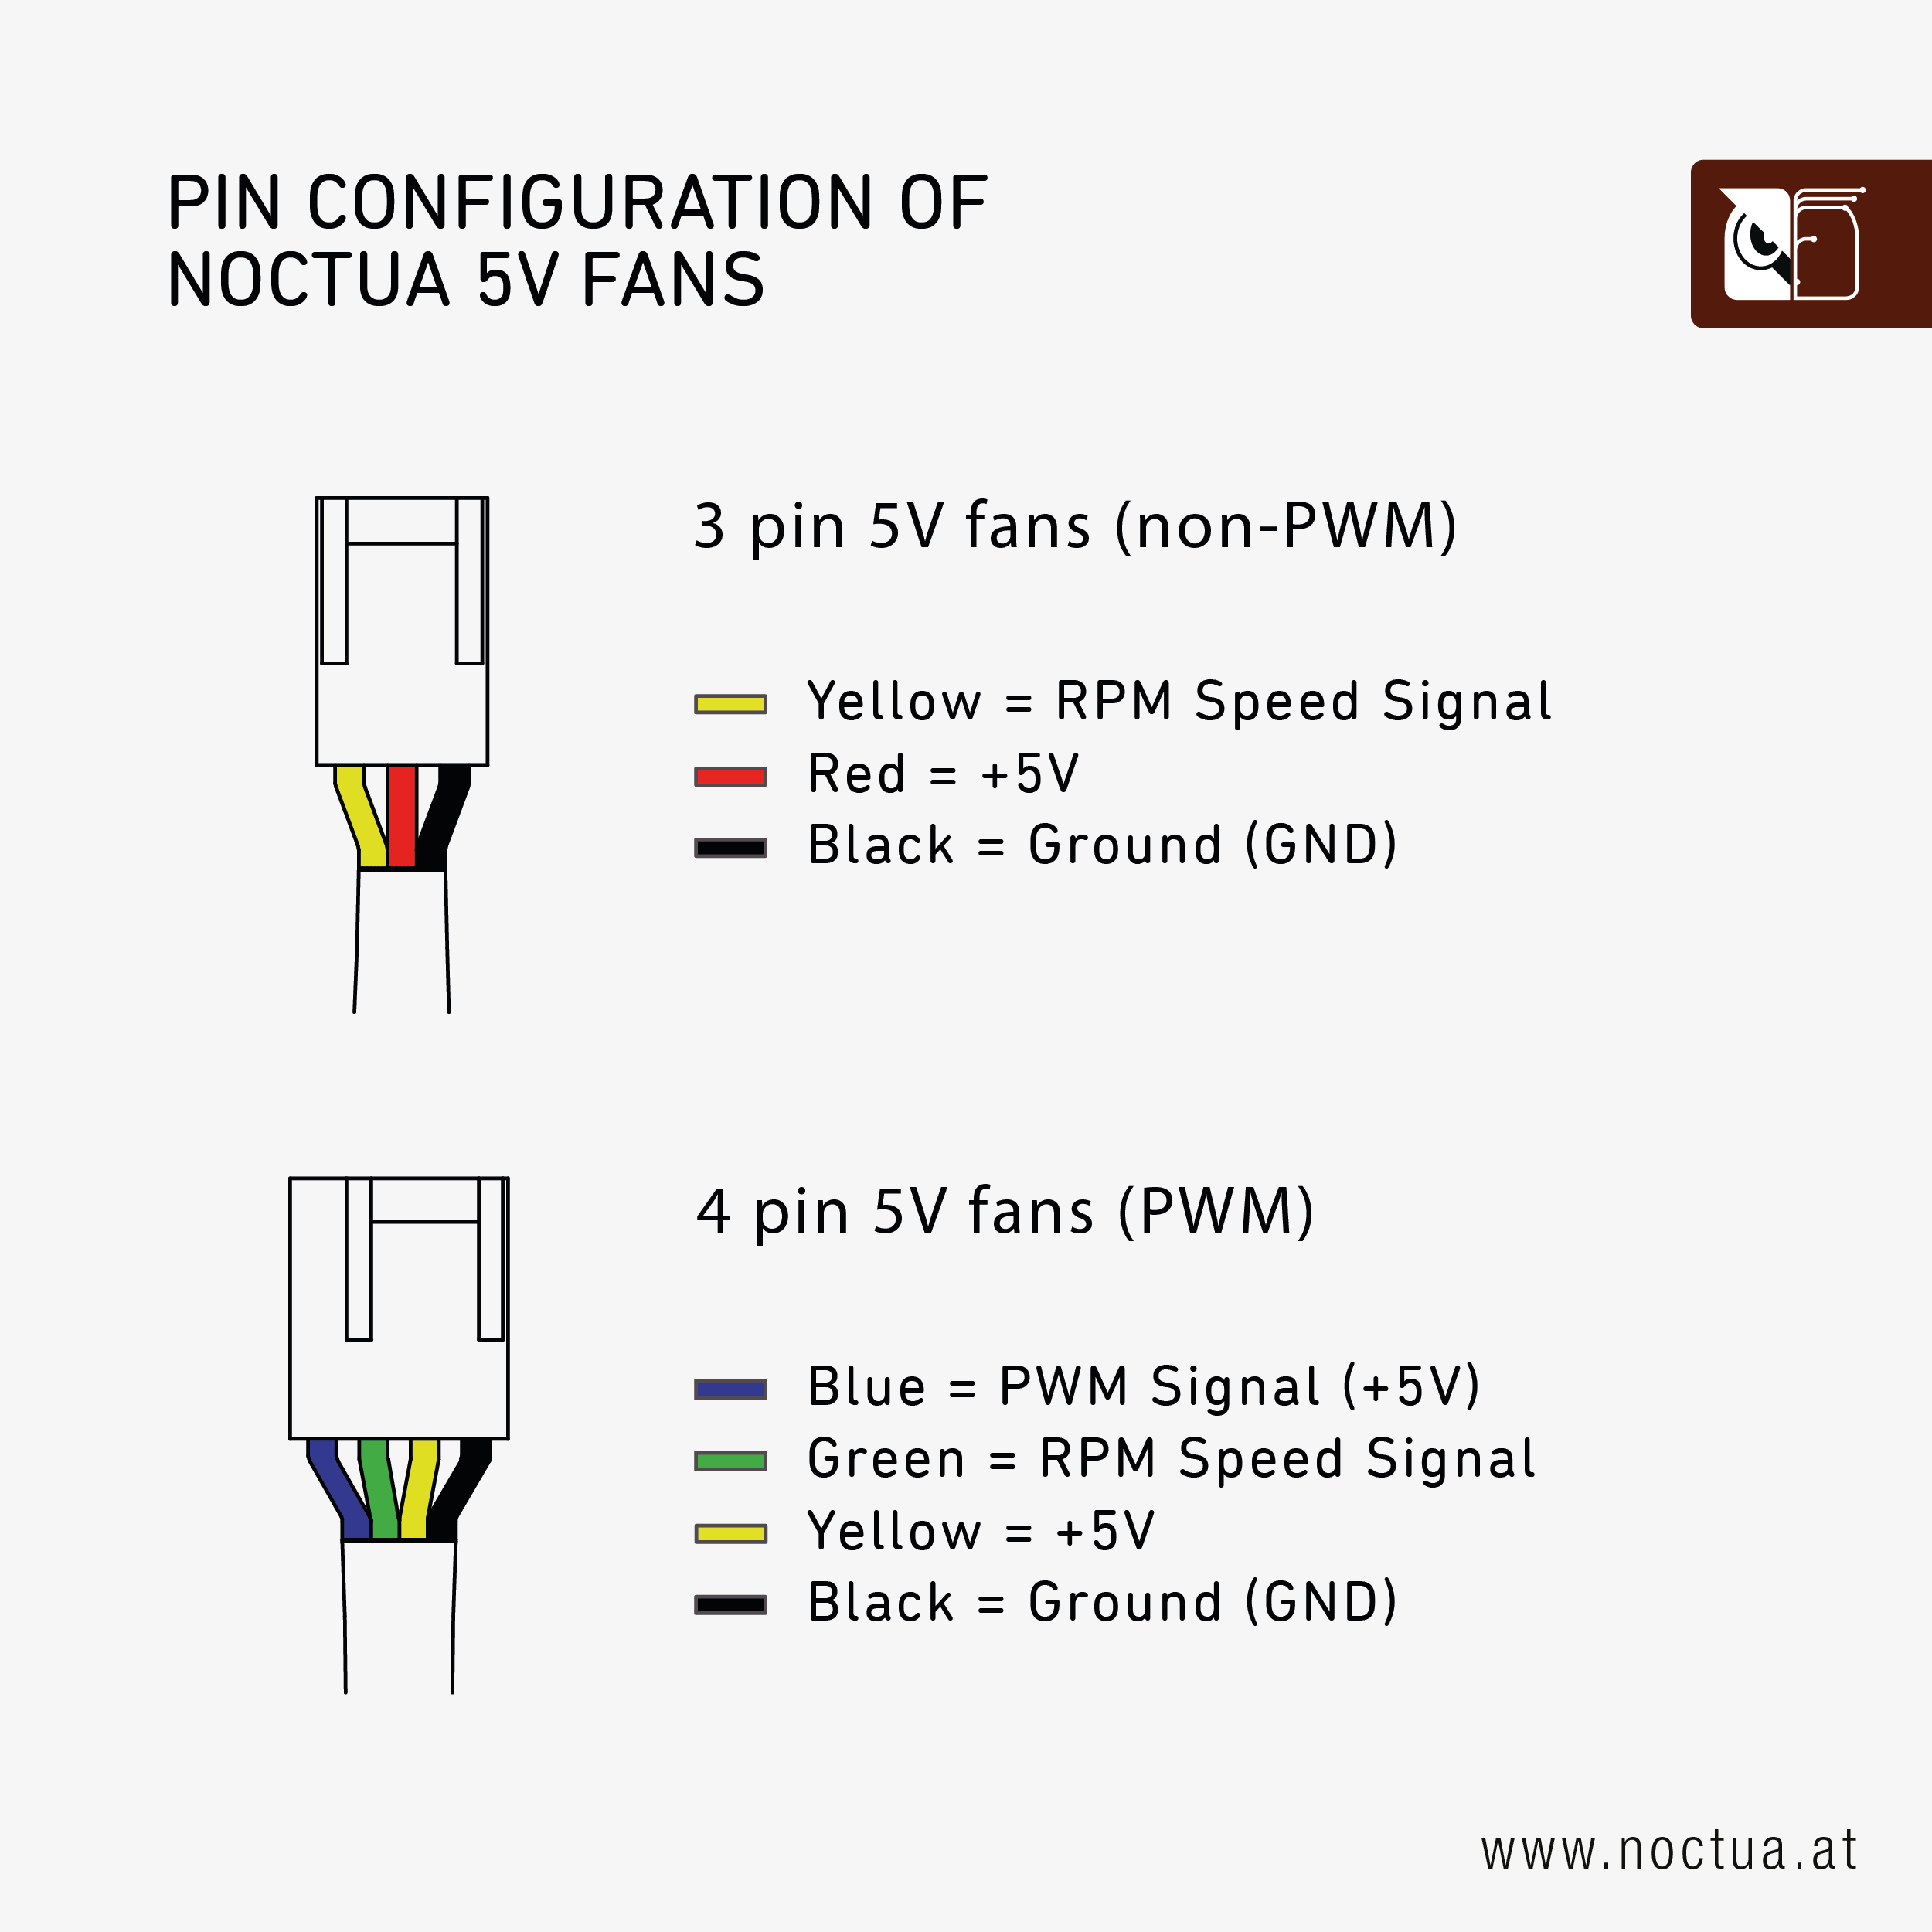
To summarize:
- PIN #4 (5V) to Yellow
- PIN #6 (GND) to Black
- PIN #28 (PWM) to Blue (You can choose any GPIO pin with PWM capabilities, but I used GPIO 28, you need to edit FAN_PWM_PIN in your pwm_fan.c to be 17 for PIN #28. Look at the GPIO Definition the Function1 is the number you need here)
- We leave Green disconnected (You could connect it with a little bit of work, but I don’t care about the fan speed)
The fan will run at full speed for now. To control the speed we follow the documentation above and use the pico SDK to control the GPIO.
The documentation is straight forward, but I had a little gotcha: The documentation uses ttyS0, and it is hardcoded in the
python example code. To see which tty is used you can use the command sudo dmesg | grep tty and look for the one that looks like this
[ 0.399505] 00:05: ttyS4 at MMIO 0xfe040000 (irq = 17, base_baud = 115200) is a U6_16550ATo edit the fan speed, just edit the pwm_fan.c and rebuild.
A note: The fan will run at full speed, when the board is turned off, since the GPIO supplies 5V even when the board is in power off state. This is not a problem for me, since I plan on running the cluster 24/7.
That is all for now. The next step is the case. You can see a prototype of the case in the cover image.
Next up: Part 3