Radxa X4 N100 Cluster Build Log - Part 1: The Heatsink
A few weeks ago I was looking at a few new SBCs and I stumbled upon the Radxa 4 N100. The layout is similar to the Raspberry Pi 5, but there are some really nice differences.
A short list of the most interesting differences to me:
- 2.5 Gbit Ethernet
- M.2 2230 PCIe 3.0 slot without any adapters
- 2x USB 3.2 Gen 2 Host ports for 10 Gbit/s
- LPDDR5
and most importantly: The N100 is a quad-core X86 CPU with really low power consumption and modern X86 features.
This means it’s a great board for a cluster build!
Here is the starting shopping list:
- 4x Radxa X4 N100 (1x 4GB, 3x 8GB; no eMMC)
- 4x Radxa Power PD 30W
- 4x Raspberry Pi 256GB SSD
Now there is an official heatsink with a fan available, but some people had seemingly terrible experiences with it:
Even if you go all out with some thick thermal paste, the heatsink can’t pull enough heat off to keep the CPU from throttling, even with a reduced power limit. On top of that, the integrated fan cable is laughably short, and the wires have to be stretched pretty tightly to plug into the 2-pin fan header under the USB ports.
Source: https://www.jeffgeerling.com/blog/2024/radxa-x4-sbc-unites-intel-n100-and-raspberry-pi-rp2040
Also, if there wasn’t some DIY aspect to this project, where would be the fun in it?
Finding the right heatsink
While there are heatsinks for Raspberry Pi 5 I could use, they are really expensive and since the board layout is different you run the risk of the heatsink not fitting properly.
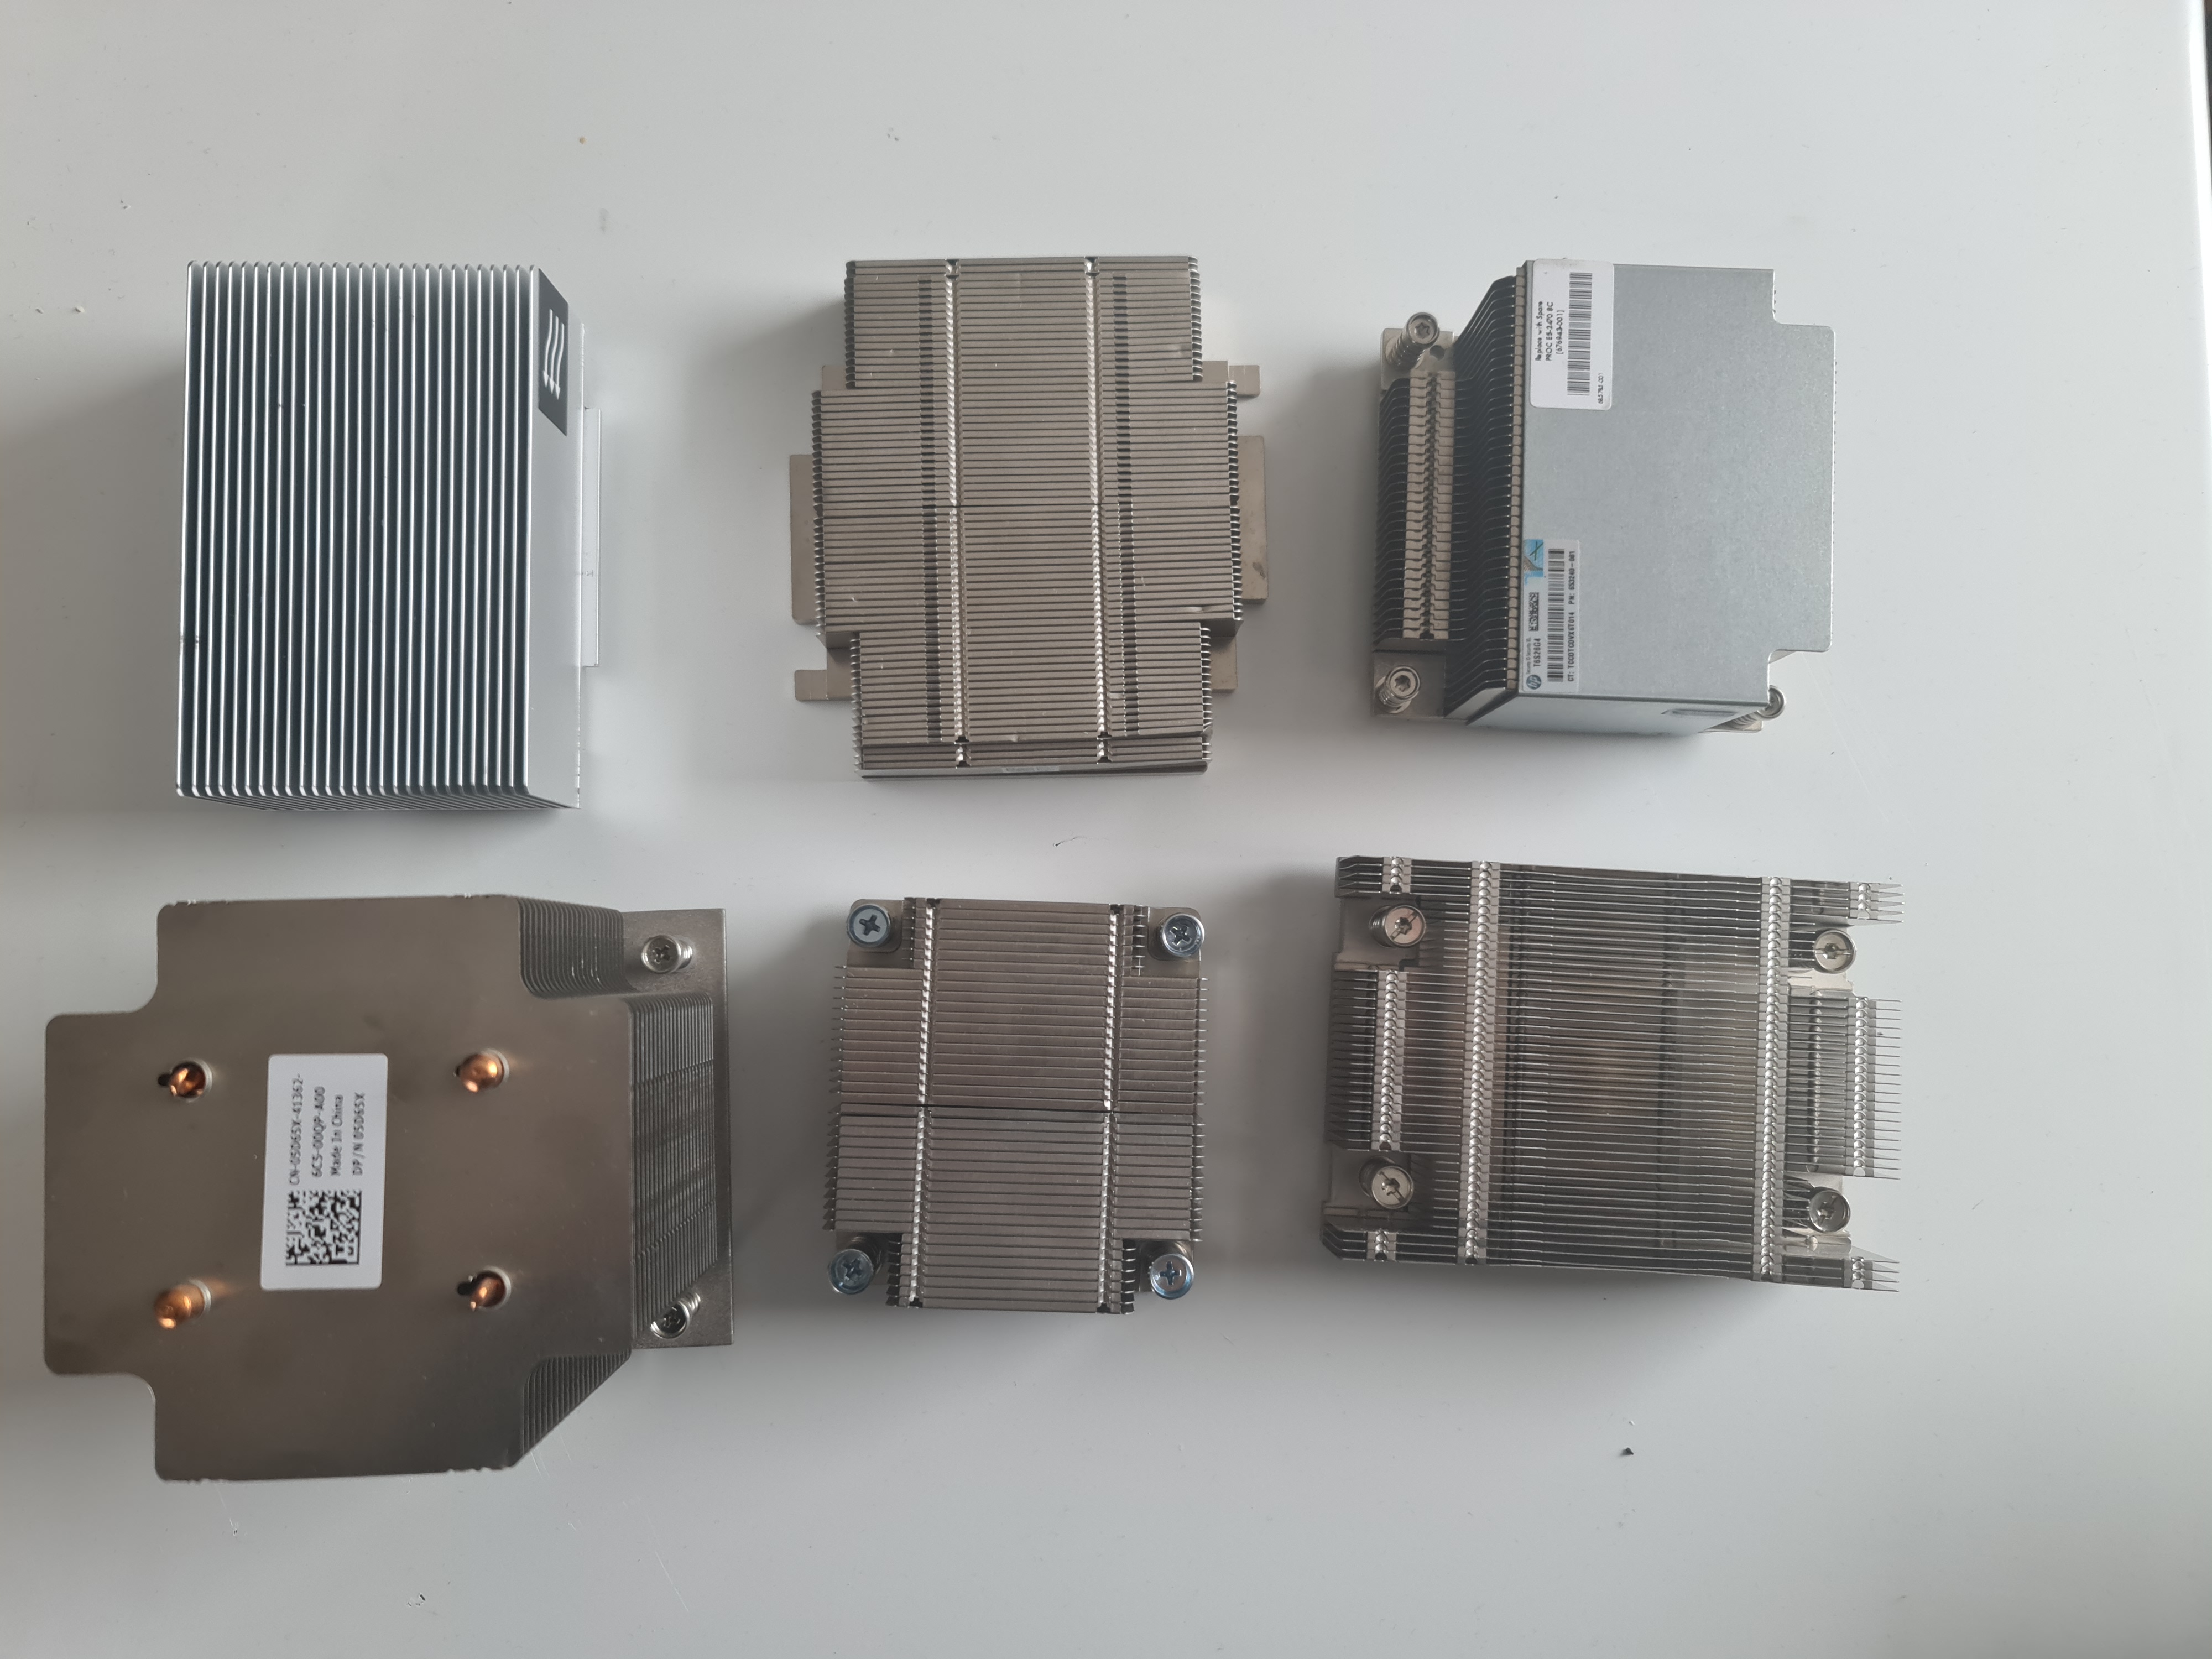
So I decided to buy a random selection of used heatsinks from a used server parts shop. After some testing around, I found one that seemed to fit well enough.
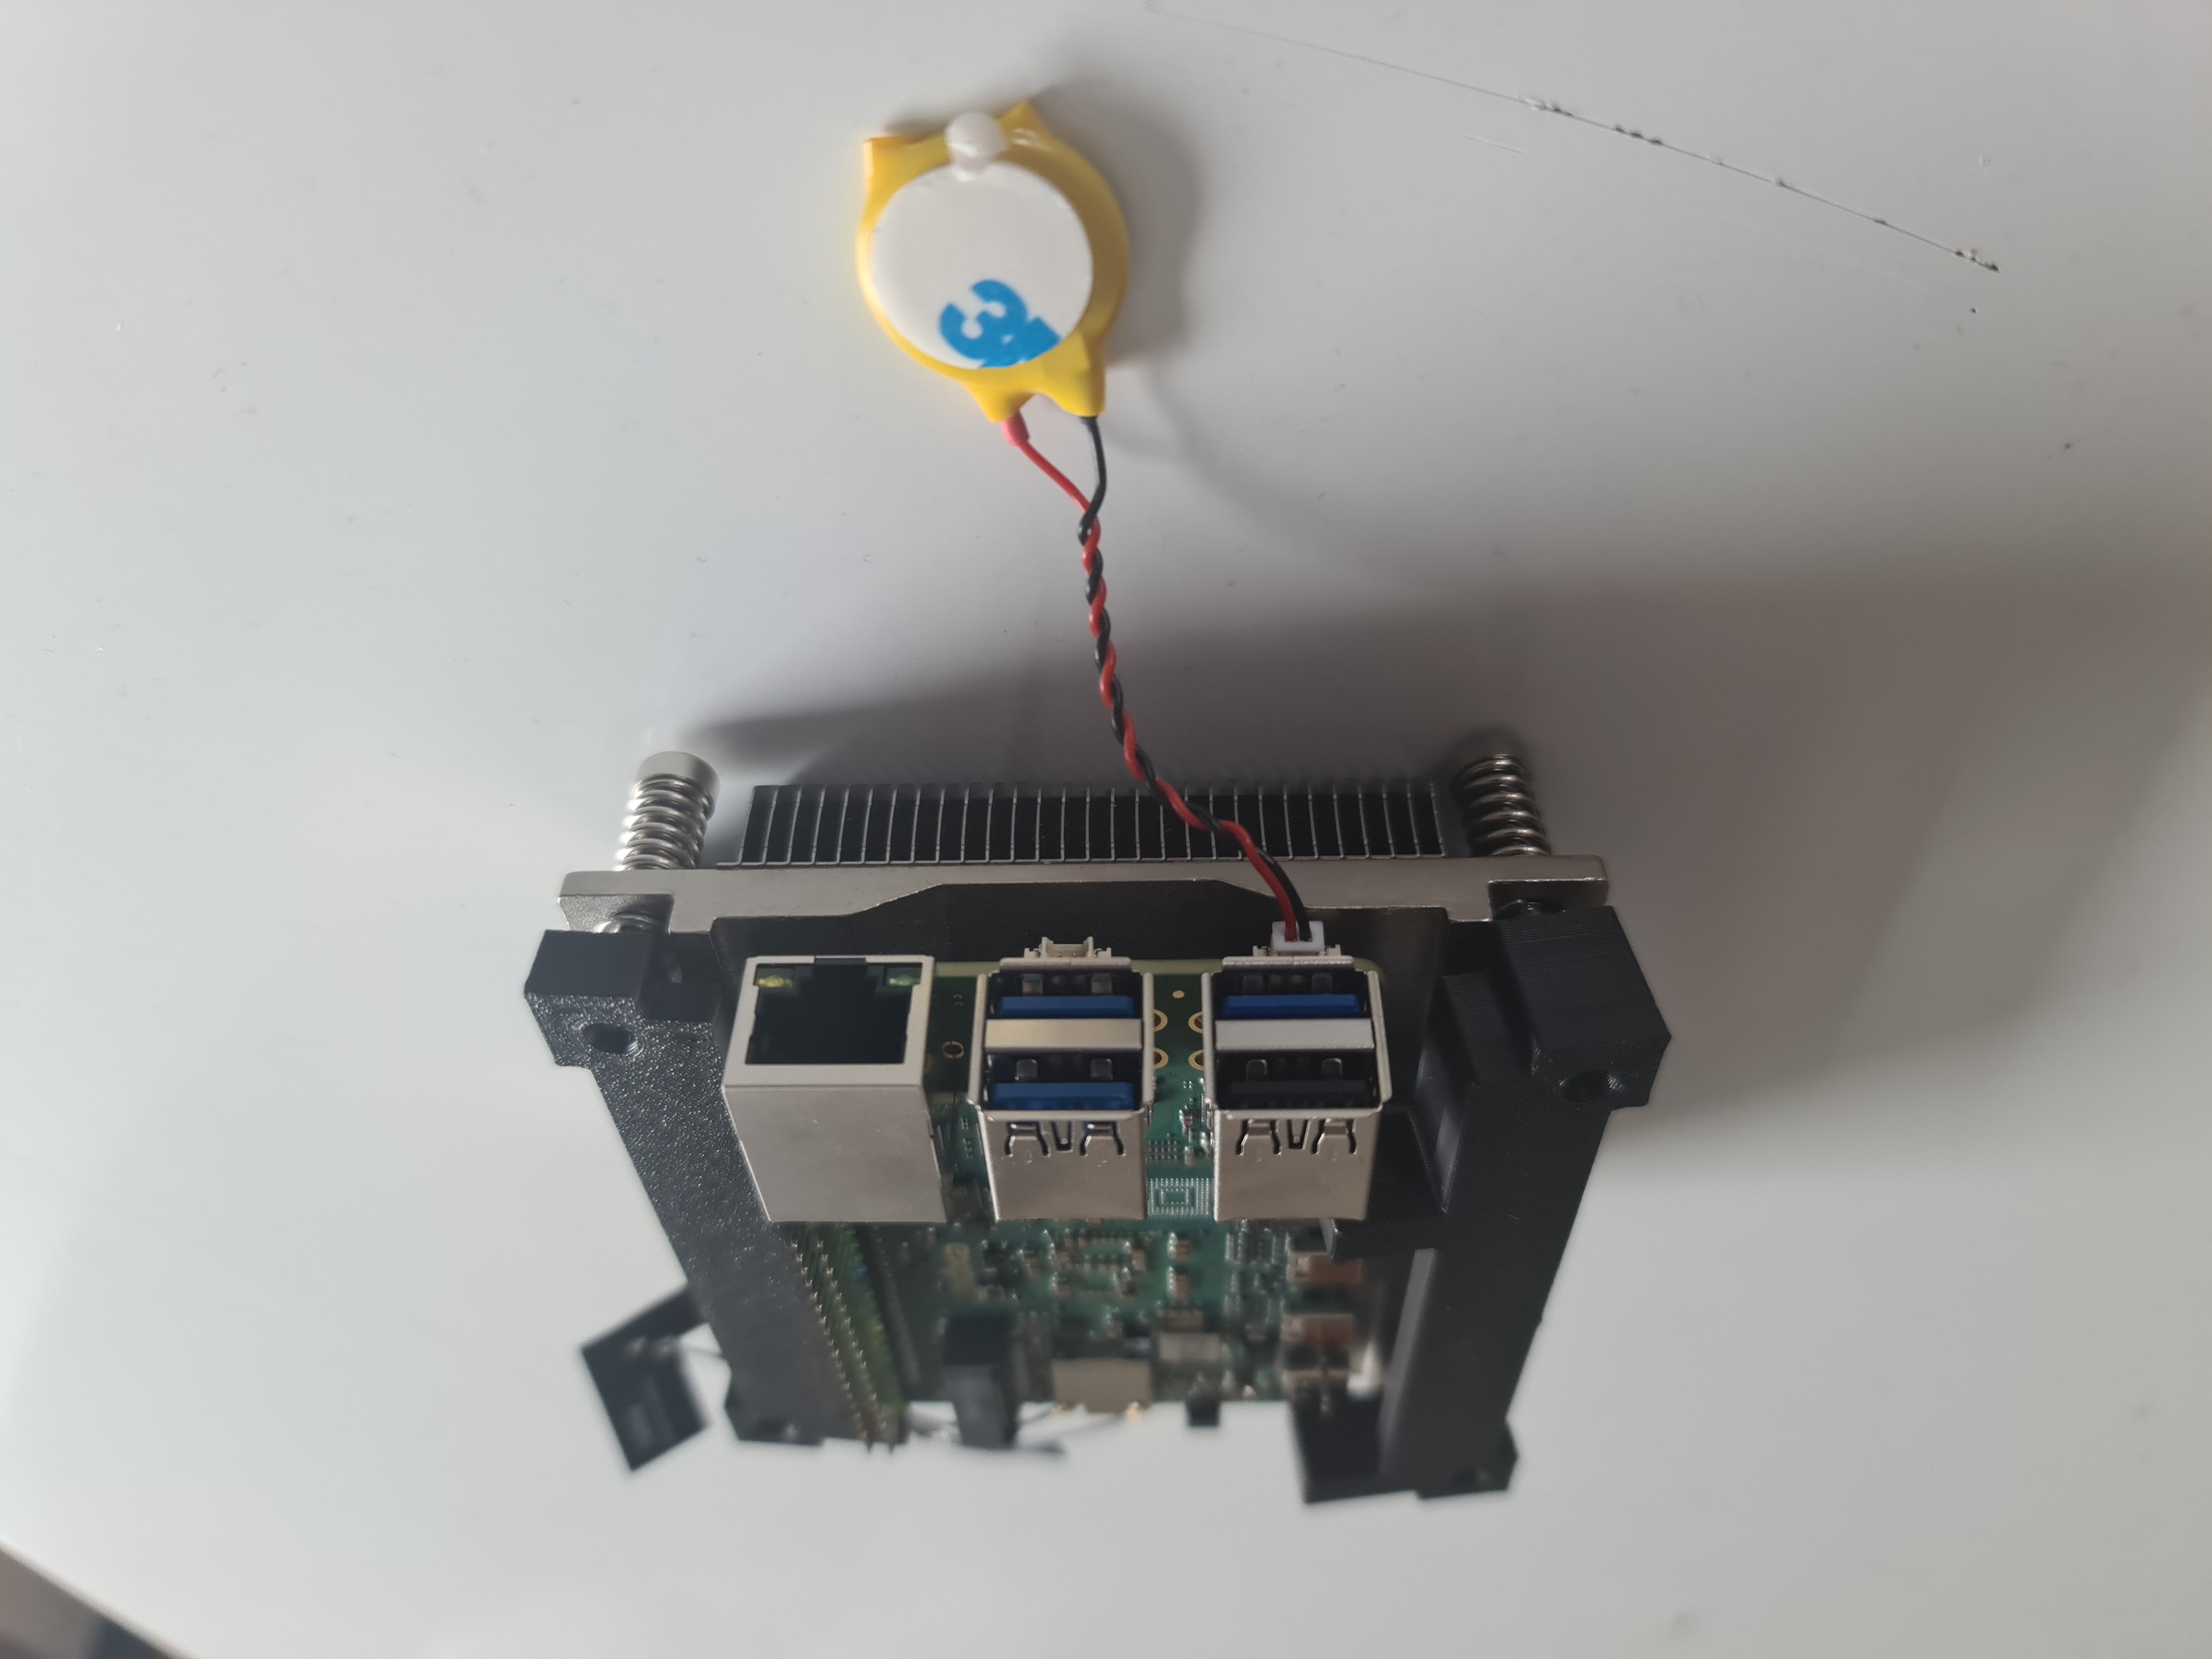
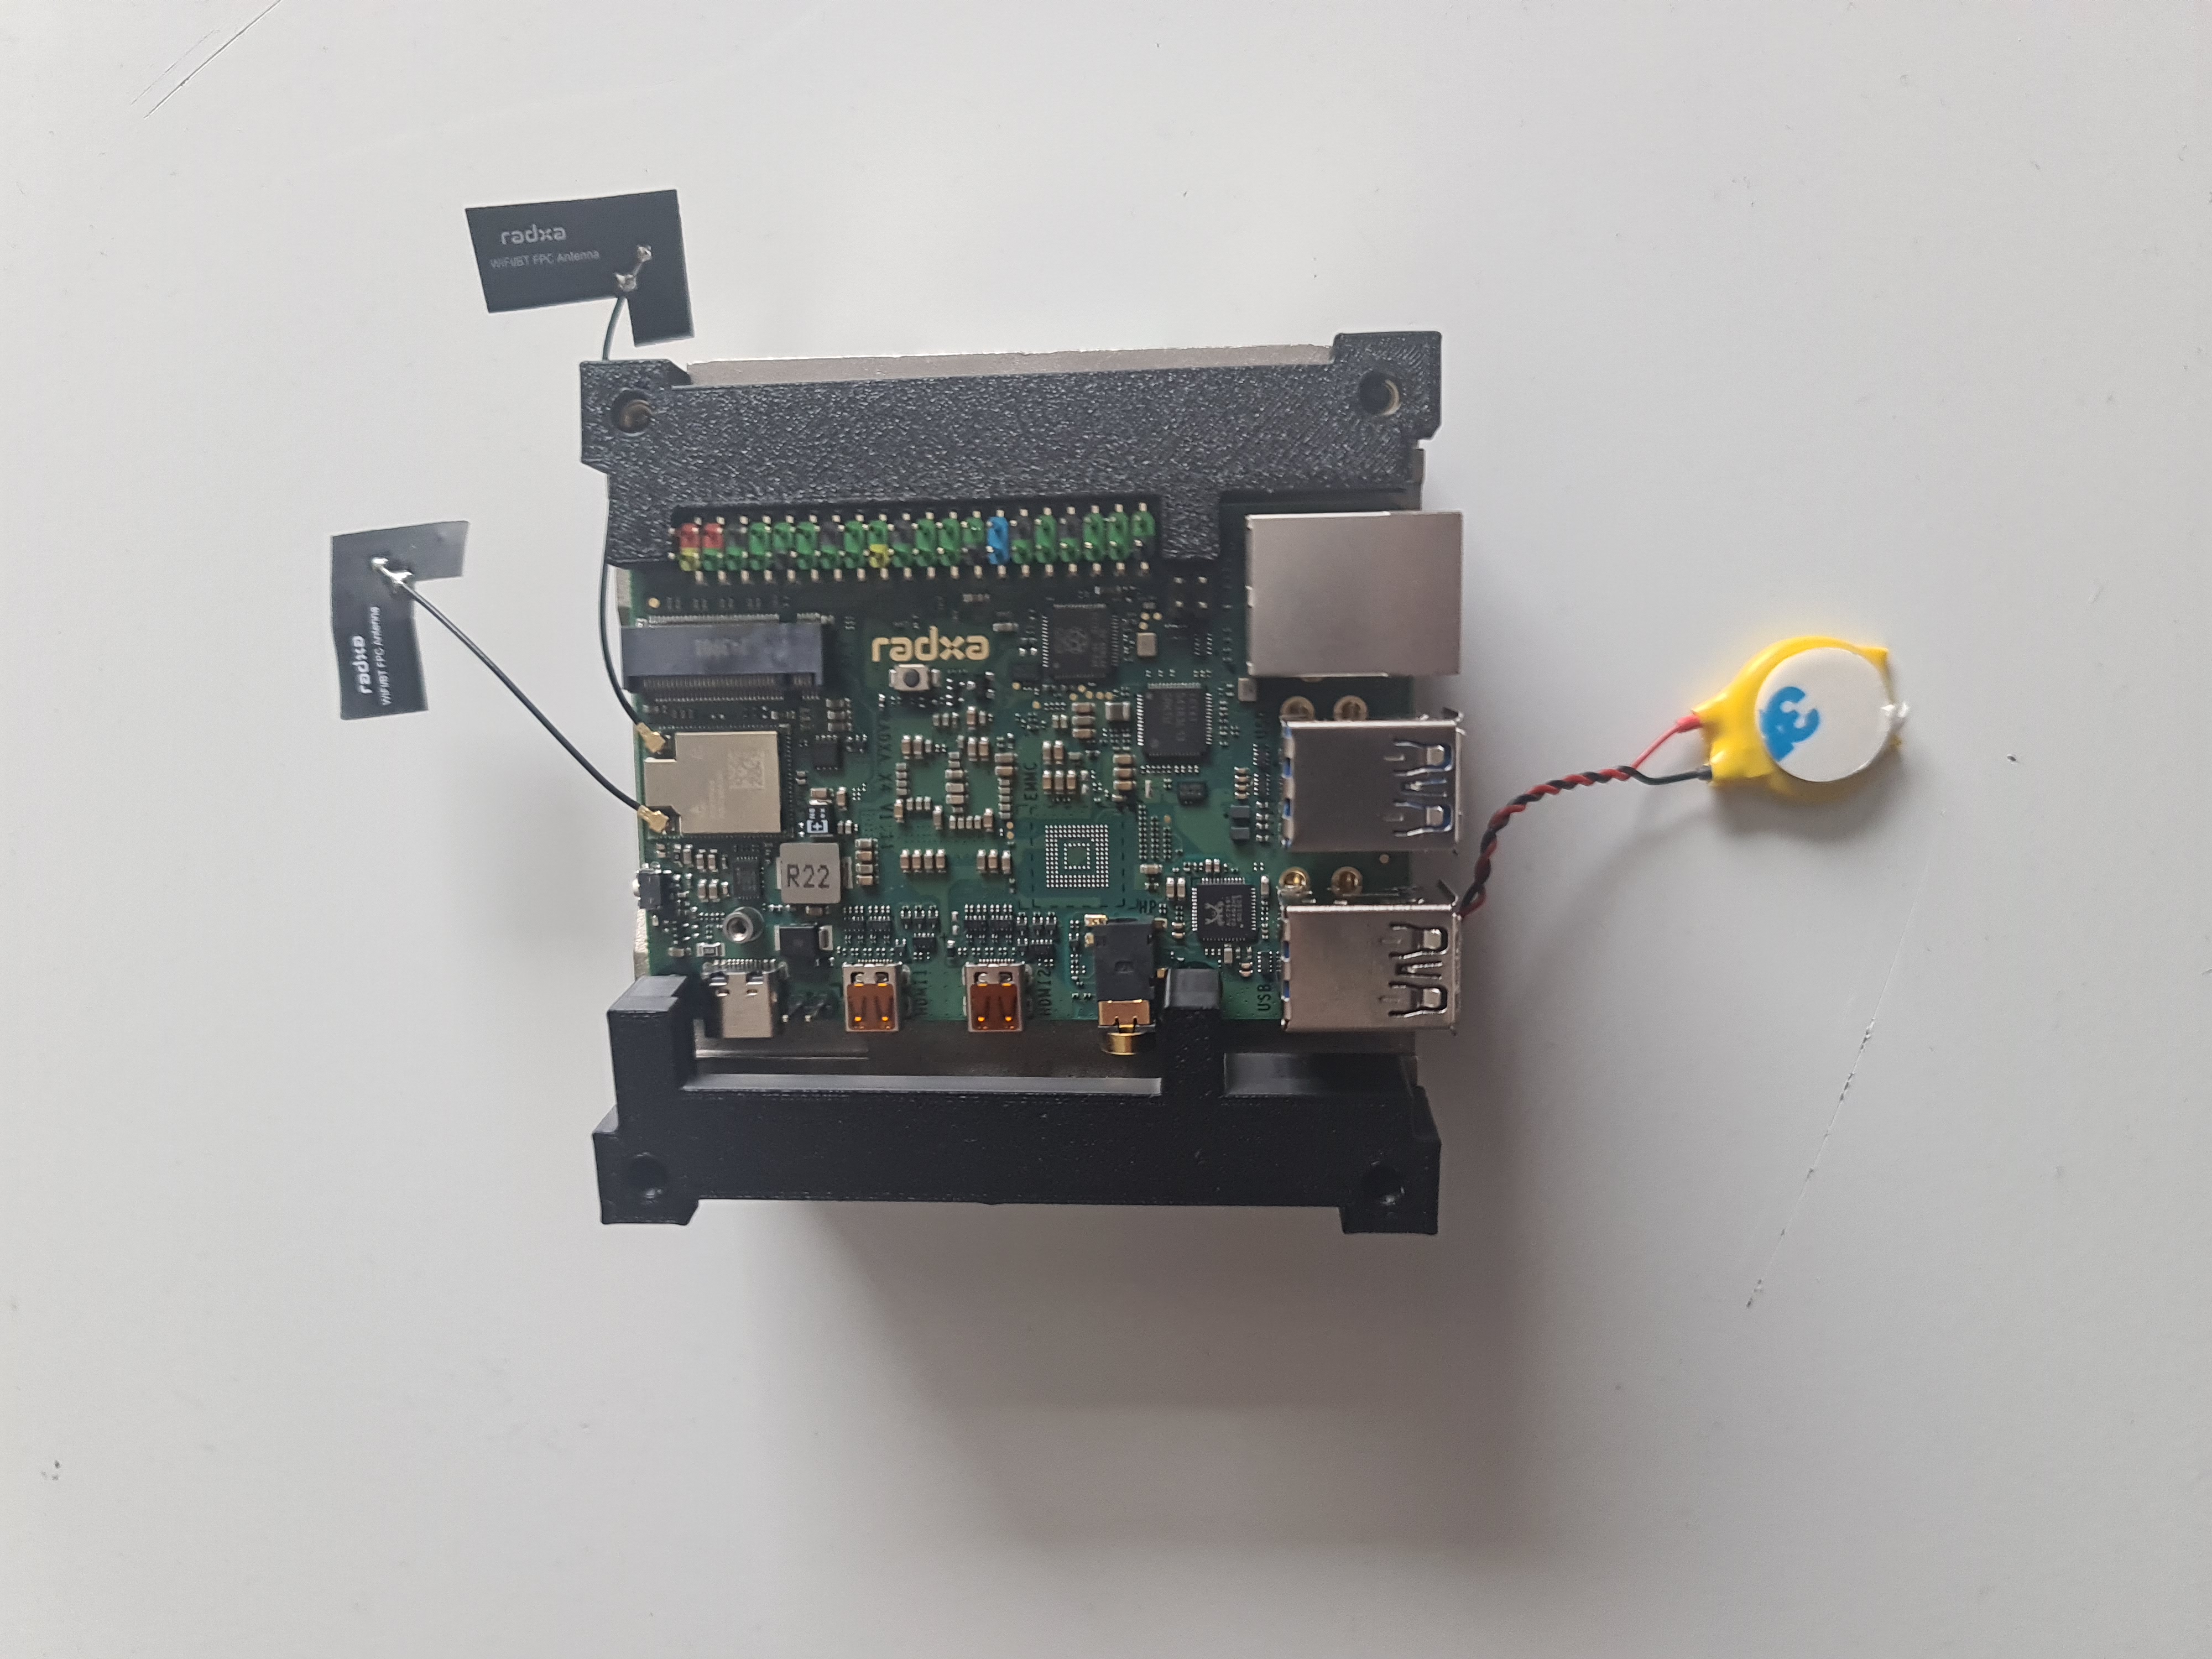
The CPU cooler of the ProLiant DL380 Gen8 (676952-001) and the best part is: It was only 3€!

Mounting the heatsink
Things I like about the heatsink are:
- it has a nice big copper base
- it is relatively large
- it already has screws to mount it to the board
Warning: I am not a mechanical engineer, so this is not the best way to do it. Be careful when using this design. and when handling your board.
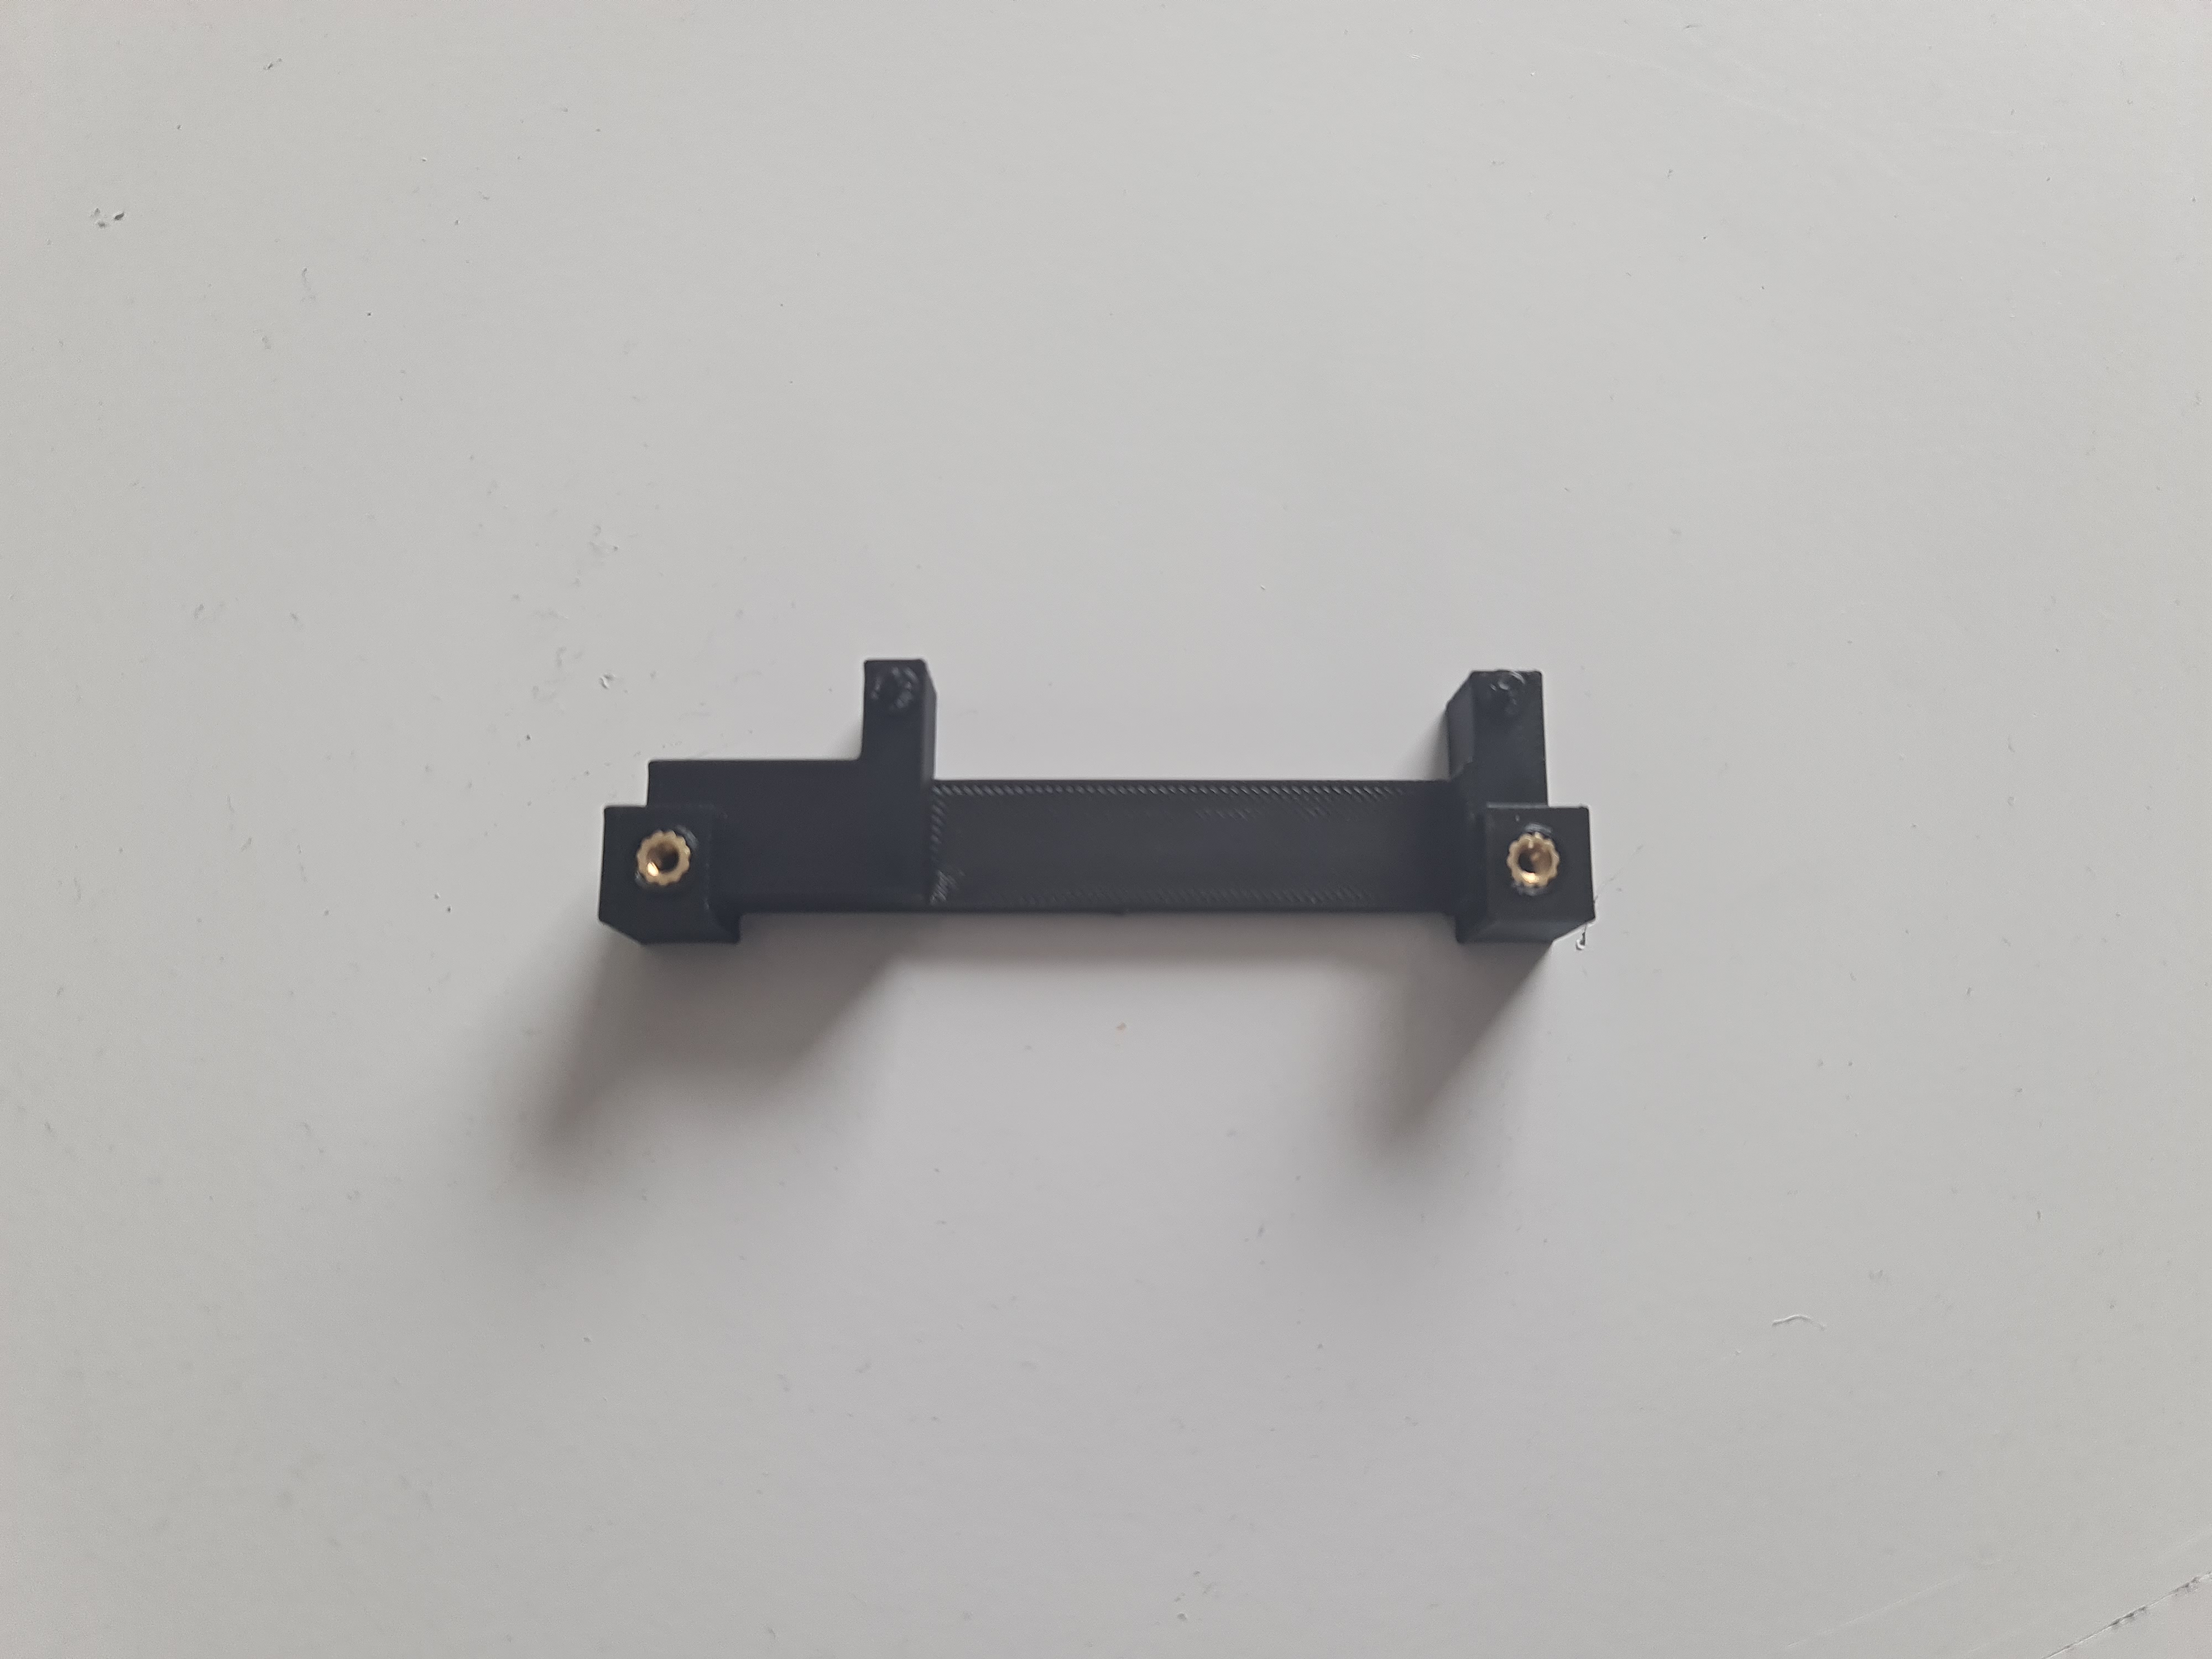
I created a few brackets to mount the heatsink to the board. If you want to use them, make sure you print them in non-conductive material.
The brackets need M3x5x5 inserts for the screws. The board is being held down by the Pins on the brackets and the screws on the heatsink. It should make sure there is even pressure on the CPU and the heatsink.
Before mounting the heatsink, you need to apply either silicon pads or thermal paste to the CPU. The more even the pressure is, the better the thermal transfer will be.
The STL can be downloaded here https://github.com/0xC9C3/radxa-x4-cluster . I had no time to clean the model up, so it is a bit rough around the edges.
Testing the heatsink
For my test I did not use some silicon pads very sparingly. So the heat transfer was probably not optimal. But here are the results in short:
I used a debian live image to boot the board and run a few tests.
Idling the CPU was around 48°C. The temperature was stable and did not change much.
With a few stress tests running and the CPU at 100% usage, the temperature was around 75°C. The heatsink was relatively hot. The temperature was stable, which is hopefully a good sign.
Raspberry Pi 5 compatibility?
I have not tested the heatsink on a Raspberry Pi 5 yet, but I think it should work. The distances to the screws for the brackets might need to be adjusted, but the overall design should be compatible.
What next?
The cooling setup is not yet complete. Since I want to create a rack mountable case, I will also add fans to the case, which should help with cooling. Since the shop I ordered the fans from did not have the ones I wanted in stock, I will have to wait a bit longer.
Once they are here and installed, I will do post with a more detailed test and some actual numbers and taking a closer look if the CPU throttles or not.
Next up: Part 2